
You know what’s super frustrating when you want to start working on your flexibility?
Thousands of posts telling you to stretch – and then showing you poses you can’t even do! It’s like these companies looking for interns with job experience, but you can’t get experience because you first need to GET A JOB.
One of the poses that is recommended for increasing flexibility is the butterfly stretch. Or, in yoga words: Baddha Konasana.
Related: Why can’t I touch my toes? Reasons & solution!
Disclosure: Some of the links below are so-called provision links, meaning, at no additional cost to you, I can earn a commission if you click through and make a purchase.
How to do the Butterfly stretch correctly
Just in case, let’s quickly look at how the pose works.
Basically, you sit on the floor with your back straight and your legs stretched out in front of you. Then, you bend your legs at the knees and bring the soles of the feet together, letting the knees fall out to the side.

For very flexible people, the knees will touch the floor, giving a nice stretch to the inner legs and groins.
The problem with butterfly stretch for beginners
Even though this pose looks quite relaxing, it can be inaccessible to beginners. Due to our modern lifestyle, our hips are really tight.
So sitting in the butterfly stretch with a straight back is simply not possible for many people!
How to stretch if you can’t do butterfly pose
The good news is: there are so many other stretches to help you stretch your hips and legs!
So if butterfly pose is impossible for you right now, don’t worry. Try the following stretches instead and see how they “open up” your hips over time!
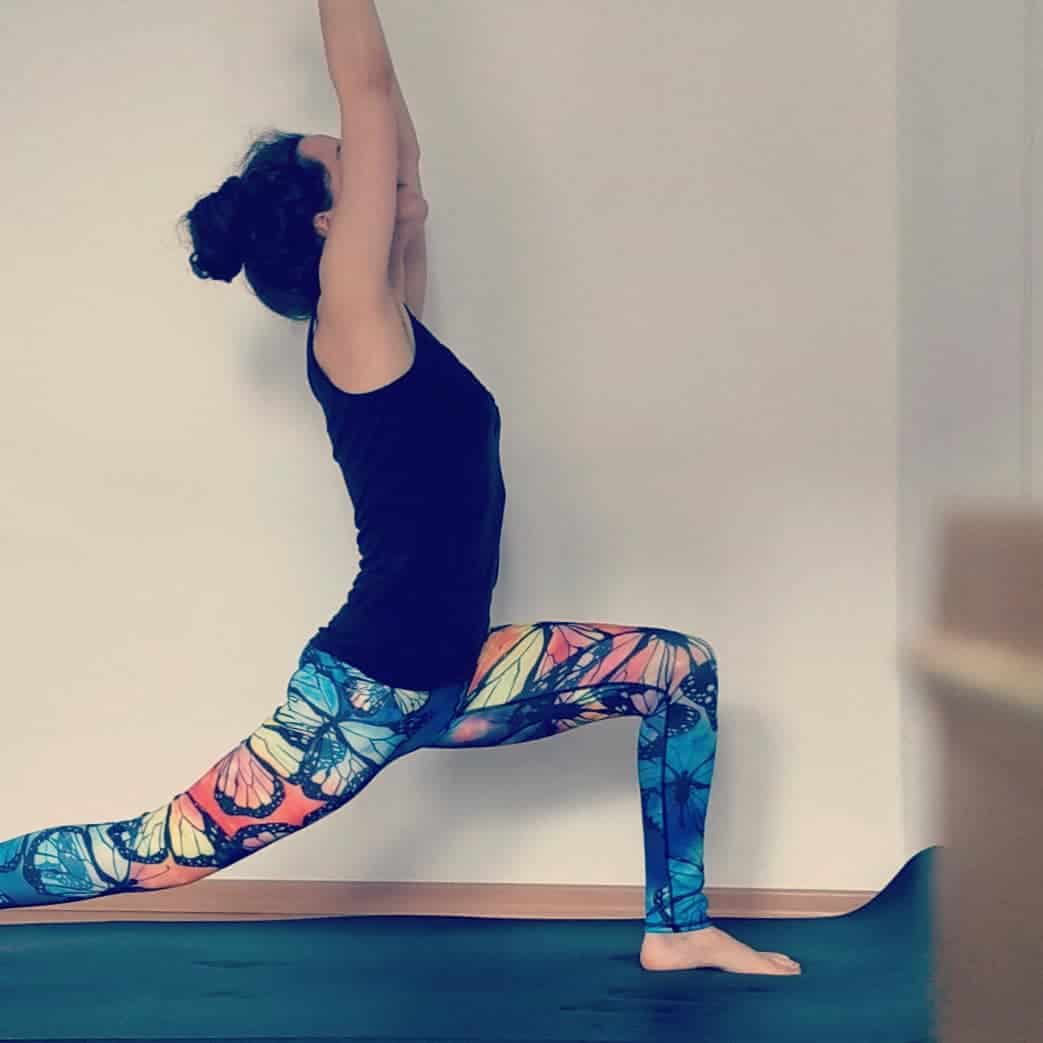
Low lunge
If you can’t sit in butterfly pose with a straight back, I bet your hip flexors are tight. And the easiest way to give those a good stretch is the low lunge.

Practice this pose on both sides regularly. I’d recommend doing it for at least 30 seconds each time. This gives your muscles some time to relax.
If you want a really detailed description on how to practice this pose with correct alignment, you can read how to do a low lunge step by step here!
Figure four stretch
Butterfly pose needs your legs to rotate externally (to the outside). An easier way to stretch that way is the figure four stretch.
I personally love it laying down, but you can do it standing and sitting as well!
To do it, you simply cross one ankle over the opposite knee, letting the top knee fall out to the side. This way, your legs form a shape resembling a “4” – hence the name.

It’s important to keep your feet flexed to protect your knee here. You want to feel the stretch in the outer hip and leg – not in the knee.
Reclined Butterfly stretch
One way to make Butterfly pose much easier is to do it when laying down.
(Yes, I know you said you can’t do butterfly pose. Try this version! You just might be able to do it!)
Get yourself some pillows or blankets you can use to prop up your back, and then it’s time to get comfy!
First, put the pillow or blanket behind you and lay back on it. Then put the soles of your feet together and let your knees fall out to the side.
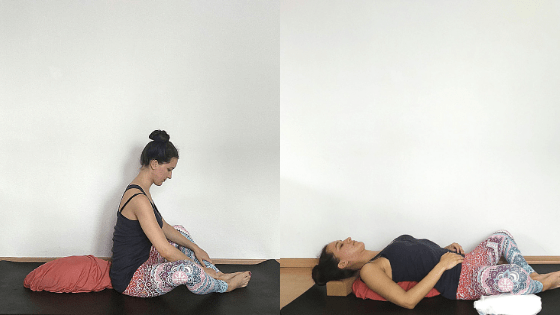
No need to push or pull here, just let them go as far as they want to. If the feeling is too intense, put some more pillows or yoga blocks under your knees.
Related: What to use instead of Yoga blocks: 7 alternatives
The stretch should feel comfortable, not painful! You should be able to breathe deeply and relax.
You can stay in this pose for a few minutes. Just breathe and chill. Gravity will do all the work for you!
Frog pose
Alright, are you ready for an INTENSE inner thigh stretch? The good thing about this one is that it’s accessible for most beginners, but whoa! It can be a bit too much…
However, do try it out, as stretching the inner thighs is going to really help your flexibility.
You want to come down on all fours, and then slide your knees out to the side, as far as they will go. Make sure your hips are in line with your knees, and your ankles are in a straight line behind your knees.
In other words: Your knees and hips build one straight line, and your lower legs make a 90 degree angle to that line.

You can stay on your hands or come down to your forearms. Eventually, you might want to lay your whole upper body down on the floor while keeping your hips in line with your knees.
Just try out what feels okay for you. Remember, to stay in this position for a few minutes, you don’t want to make it too intense!
Make frog pose more comfortable
You want to stay in this pose for a few minutes as well. So it’s a good idea to make it as comfortable as possible.
First of all, consider padding your knees. A doubled-up yoga mat or a cushion will do. Or you can get some of these fancy knee pads.*

Another awesome way to make frog pose a little more relaxing is to put a bolster* or pillow under your upper body. This way, you can lay down on it and really relax for a little!
Related: 12 of the best restorative yoga gifts for some yogic R&R
How do you practice butterfly pose?
So let’s say you’ve been doing these other stretches for a while and now you want to get back to actually practicing the butterfly stretch itself.
The way I recommend to practice the butterfly pose for beginners is to use props. All of them!
Prop up your hips
First of all, if you can only sit with a rounded back, you need to lift your hips. Sit on a yoga block, a meditation pillow, a couch cushion… whichever prop you have nearby.
Prop up your knees
Secondly, if your knees are really high up, you’ll get way too tense to hold the pose for a while. So, you guessed it, put props under your knees.
Honestly, I used to build whole towers of props to get to my knees. Did it look a little weird? Maybe. But it put me in a position (literally!) where I could actually let my inner groins relax – and that’s the goal!
Sit against a wall

My last tip for getting a better butterfly stretch is to sit with your back against a wall. This will help you keep a straight back and to have the forward tilt in your hips.
But, only do this if you already got rid of the prop under your hips. The wall is to help you go from sitting straight to forward tilting.
So get to the straight sitting without props first!
Still think you can’t do the butterfly stretch?
I hope this guide helps you on your path to increased flexibility. If it was helpful to you, please share it with others as well!

*These links are so-called provision links, meaning, at no additional cost to you, I can earn a commission if you click through and make a purchase.
Hi, I’m Leo, the Yogi behind Yogabullet. I’ve been practicing Yoga for over 10 years now.
My goal with this blog is to show people how Yoga can help anyone, no matter how fit they are, to love their body and their life more.
I’ve experienced the life-changing power of Yoga myself and made it my mission to share this with as many people as possible.
I am a Registered Yoga Teacher (RYT) with Yoga Alliance, which acknowledges the completion of a yoga teacher training with a Registered Yoga School (RYS).