
Downward facing dog is another foundational yoga pose that can be easily modified to fit inflexible beginners. The Sanskrit name is “Adho mukha svanasana”. (Don’t worry, you don’t have to remember these, it’s simply for your information.)
People often worry about not being able to bring their heels to the floor in this pose. In reality, this isn’t even necessary!
In fact, some people will never touch their heels to the floor in this Yoga pose, because their body simply isn’t built that way. And that’s fine because it’s not what the pose is about.
The most important thing in this asana is a nice stretch in the back of the body without rounding your lower back. (Do you notice a theme here?)
If you have pretty tight hamstrings, keeping a straight back might not be that easy. So again, we use a modified version of this pose that will make your back feel amazing. And as a nice side effect, it will tone and strengthen your upper arms.
Get into Downward facing dog
If you have uncontrolled high blood pressure, carpal tunnel syndrome, wrist injuries, eye or retina issues or had recent eye surgery, skip this pose!
First, we’ll get into all fours. Your hips should be directly over your knees and your shoulders over your wrists.

From here push into your hands and lift your hips back and up as high as you can. Really put an effort to get your spine as long and straight as possible.
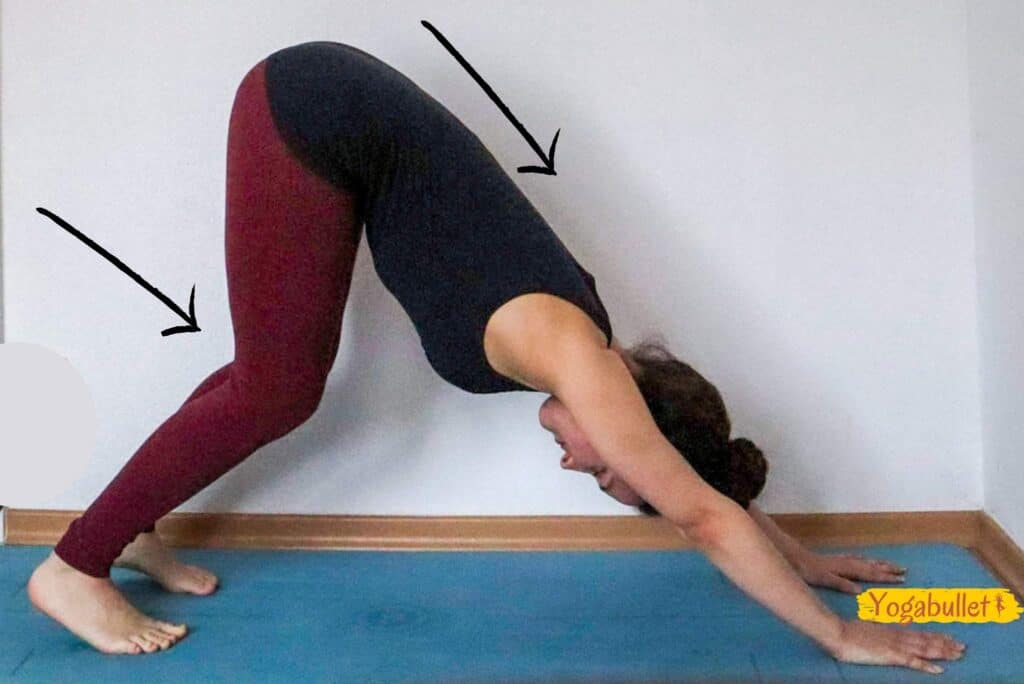
Only now start to slowly straighten your legs without compensating in your spine. Keep that back straight! As soon as you start noticing your lower back rounding, stop.
It’s possible that this means keeping your knees bent. Just play around with what works for you.
You should feel a slight stretch in your hamstrings again at this point.
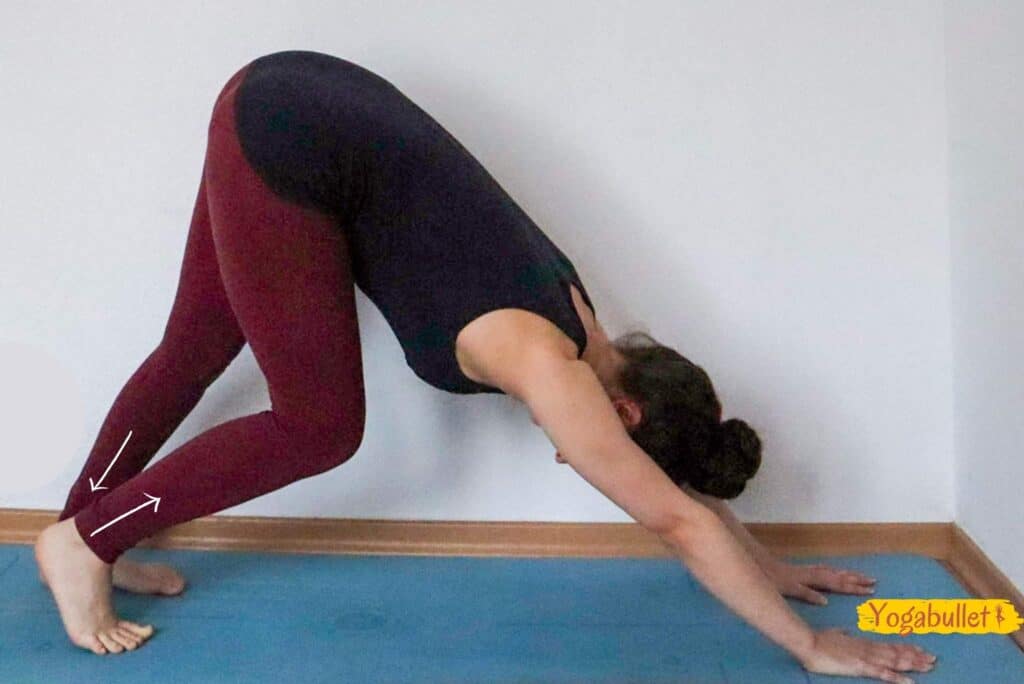
To warm up your hamstrings, especially in the mornings, it can really help to pedal your feet.
Basically press one foot down, then press the other foot down in an alternating motion. You can play around with giving in with your hip or keeping the hips levelled.
More things to be aware of
The most important thing is that you are aware of what’s happening in your body. You want to feel an enjoyable stretch in the heart of your back leg muscles.
At the same time, you want to firm your upper arms. Basically, you can imagine you’re slightly turning the upper arms outwards without moving your hands.
Keep the shoulders away from your ears, down on your back. And try to rotate your upper legs internally slightly, which means you’re trying to turn them towards each other without moving your feet.

Too many instructions!!
Sounds complicated?
Don’t worry if all these pointers feel a little overwhelming right now. That’s perfectly normal!
I remember when I learned this pose for the first time.
By the time I had heard all the pointers, I had already completely forgotten what the first ones were! But that’s fine and totally understandable.
You’ll internalize all of these little muscle actions with time and practice. At some point, it’s just gonna happen automatically.
So while you’re hanging out here in Down Dog, you can use your outbreath to guide you deeper into the pose. When you breathe in, make your muscles strong, straighten your back again. And when you breathe out, see if you can maybe straighten your legs a little more? Or maybe you can melt your upper body a little more towards the floor.
Whatever happens, make sure that it’s enjoyable. You want to relax into the pose, not push or pull.
Keep it safe!
After holding the pose for a few breaths, gently bring your knees back to the floor.
If you have high blood pressure, even if it’s controlled, please do not hold this for longer than 30 seconds.
Typical challenges in Downward Dog
If you’re just starting out with Yoga, Downward Facing Dog can be quite a challenging pose.
First of all, it actually needs some arm strength to hold this pose for a while. So if, in the beginning, you can hardly hold this pose: have some patience with yourself and allow for these muscles to build up over time. They definitely will if you keep practising!
Slipping hands in Downward Facing Dog
Secondly, many beginners struggle with slipping hands. Of course, a good yoga mat can help with this, but even the best yoga mat can’t prevent this from happening completely.
What helped me most as a beginner was the tip to really activate my hands. Specifically, consciously pressing my fingers into the floor. Make sure that they’re spread evenly and focus the weight slightly on the thumb and index finger.
If you’re still slipping, try curling up your fingers a little.

Wrist pain in Downward Facing Dog
Our wrists don’t get to bear much weight in “normal life”. So suddenly putting so much of your weight on them can lead to painful wrists.
If you’re struggling with this, definitely make sure to give your wrists some extra love. Warm them up before attempting the pose by circling them around in both directions.
Another way to make things easier for your wrists is to start out doing Downward Facing Dog with your hands on blocks.
(You’ll find a guide to finding good yoga blocks here, or alternatively, try any of these yoga block alternatives.)
This puts a little more weight into your legs and a little less into your arms and hands.
Over time, as your wrists get stronger, you can slowly work your way back down.