Whenever I tell some “non-Yogi” how great Yoga is, I’ll usually hear something like “But I’m too inflexible for that. I can’t touch my toes!”
Unfortunately, this is a super-common misconception about Yoga. People think you have to be flexible to do it because they only know the difficult poses they see on Social Media.
But let me tell you, Yoga actually is for inflexible people! Who else would benefit most from regular stretching?!
I used to be that super inflexible person myself. Even as a child, when everyone was naturally bendy, I struggled with the simplest of stretches.
Related: How do I get more flexible for yoga? 3 steps

And now? I’m still not doing the splits. But thanks to Yoga, I can easily touch the floor in a forward fold. And it didn’t even take long to get there.
With these super easy Yoga poses for inflexible beginners, you can get there, too!
Want a more in-depth guide to starting your yoga journey as a completely inflexible beginner? Read this!
Yoga for inflexible beginners
The first thing you need to understand when doing “Yoga for the inflexible” is that every pose can be adapted to your current level of flexibility.
The real problem with the image of Yoga is that the easy poses that can be done by anyone just don’t look that cool. So you won’t really see them in an Instagram feed.
Yoga for stiff people isn’t necessarily instagrammable.
But those “simple poses” will actually increase your flexibility immensely!
Yoga practice is never about the looks. It’s about where you feel the stretch. And this can be achieved with really simple modifications, and sometimes a few Yoga props.
So let’s look at some poses that are perfect as a start to yoga for inflexible people!
Related: The complete beginner’s guide to Yoga
Related: How to use a yoga strap to improve your practice (+free PDF)
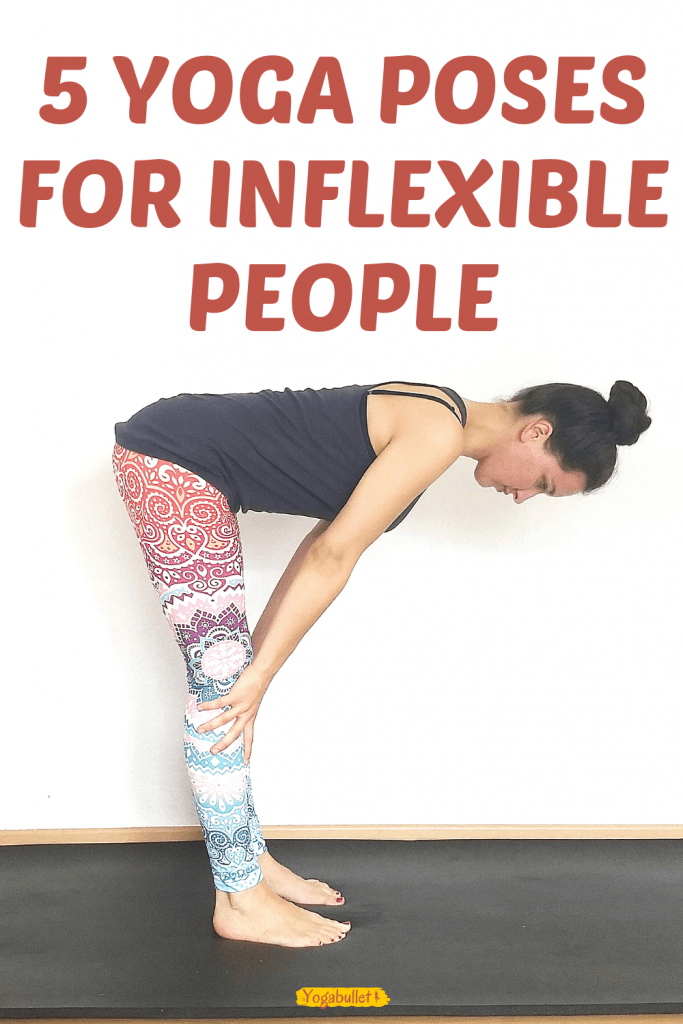
1. The forward fold
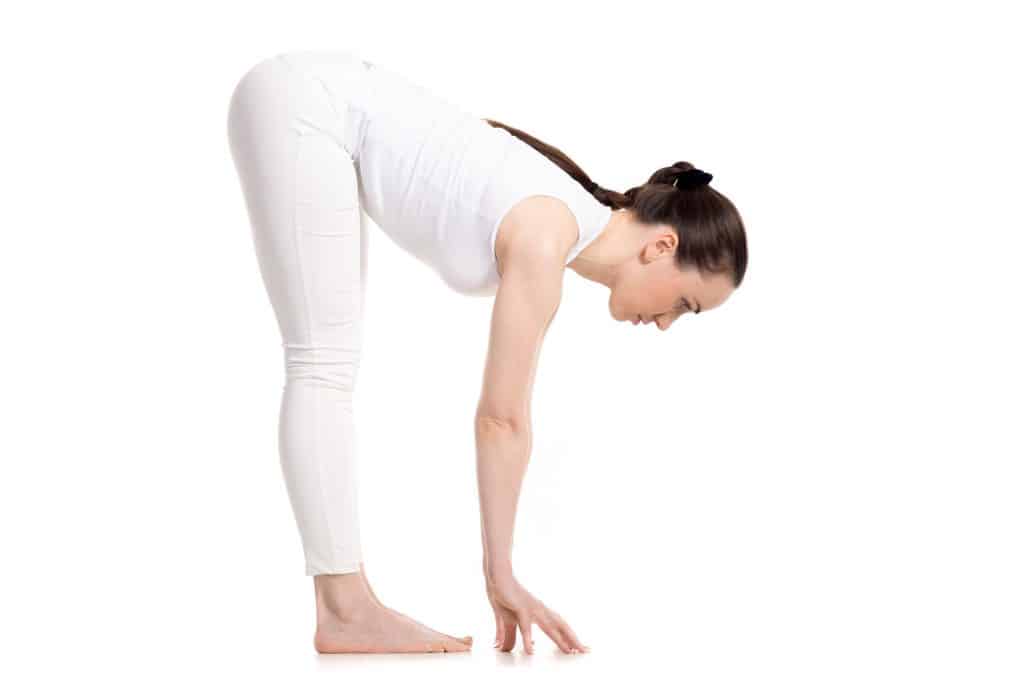
Let’s start with the ominous “toe-touch-pose” because this is the asana most non-flexible people are most afraid of.
Related: Why can’t I touch my toes? Reasons & solution!
The goal of the forward bend isn’t actually to touch the floor. It is to stretch the back of your legs, the hamstrings, while keeping your lower back safe.
Related: Yoga for lower back pain: How to find sweet relief
So the correct way to do this pose when you are not that flexible yet is to slowly bend forward from the hip until you feel a stretch in the back of your legs.
Make sure your lower back doesn’t round. You can do this by either looking in a mirror or by putting a hand there. If it rounds, stop and go back a little!
Now, if you’re just starting out, you might not get very far. This is absolutely fine! Remember, it’s not about the looks, it’s about feeling the stretch in the right place.
To make yourself able to hold this pose for a few breath, you have two options:
- Put your hands on your legs for support.
- Have a chair, a table, a couch or something of a similar height handy to use that for support.

To come out, make your leg muscles really strong and use your lower belly muscles to pull you back up to standing.
Hold this pose daily for 10 breaths and you’ll be amazed how much closer to the floor you’ll be in no time!
(If you don’t do any other pose, do this one! Stretching your hamstring is essential for inflexible people!)
Want to get more flexible for yoga the easy way? Check out the 14-day Toe touching challenge! It helps you touch your toes in 10 minutes a day or less.
2. Downward facing dog
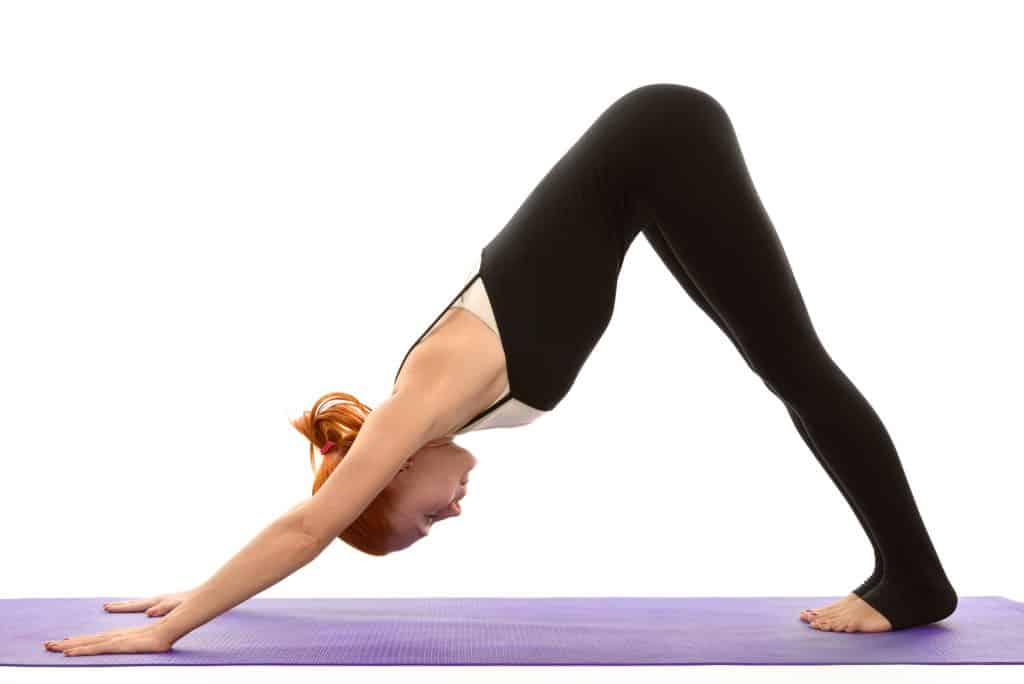
Downward facing dog is another pose that can be easily modified to fit inflexible beginners.
People often worry about not being able to bring their heels to the floor in this pose. In reality, this isn’t even necessary! In fact, some people will never touch their heels to the floor in this Yoga pose, because their body simply isn’t built that way. And that’s fine because it’s not what the pose is about.
The most important thing in this asana is a nice stretch in the spine without rounding your lower back. (Do you notice a theme here?)
If you have pretty tight hamstrings, keeping a straight back might not be that easy. So again, we use a modified version of this pose that will make your back feel amazing. And as a nice side effect, it will tone and strengthen your upper arms.
Related: Yoga for strength: these 5 poses make you strong!
So starting from all fours push into your hands and lift your hips back and up as high as you can. Really put an effort to get your spine as long and straight as possible.
Only now start to slowly straighten your legs without compensating in your spine. Keep it straight! As soon as you start noticing your lower back rounding, stop.
It’s possible that this means keeping your knees bent. Just play around with what works for you.
You should feel a slight stretch in your hamstrings again at this point. Hold the pose for a few breaths, then bring your knees back to the floor.
Related: How to modify yoga poses for bigger bodies
3. Cat-Cow-Pose
Are you wondering how to make your back more flexible? Start simple!
Cat-Cow-pose is an amazing way to stretch and mobilize your spine. Although it looks super simple, quite a lot of things happen in your body when you practice it.
Moving from cat to cow and back stretches your neck, shoulders, chest, abdomen, spine, and hips. And no matter how inflexible you think you are, you can start practicing this pose right away!
To start, get on all fours with your hips directly over your knees and your shoulders directly over your wrists. On an in-breath, let your belly sink low and your tailbone move up.
At the same time imagine rolling your collarbones up, reaching your chest to the ceiling. You can also look up, but don’t throw your neck back. Always keep it nice and uncompressed.

This is the cow part. Let’s turn into a cat now.
On an exhale, press into your hands and knees and curve your spine the other way. Push your middle-upper back towards the ceiling as high as you can and let your head and tailbone hang towards the floor. Looks kind of like an angry cat, right?

Repeat this back and forth a few times. When breathing in, move into the cow pose, when breathing out, into the cat.
Related: Yoga for upper back pain: 5 easy stretches that will bring relief
4. Plank pose
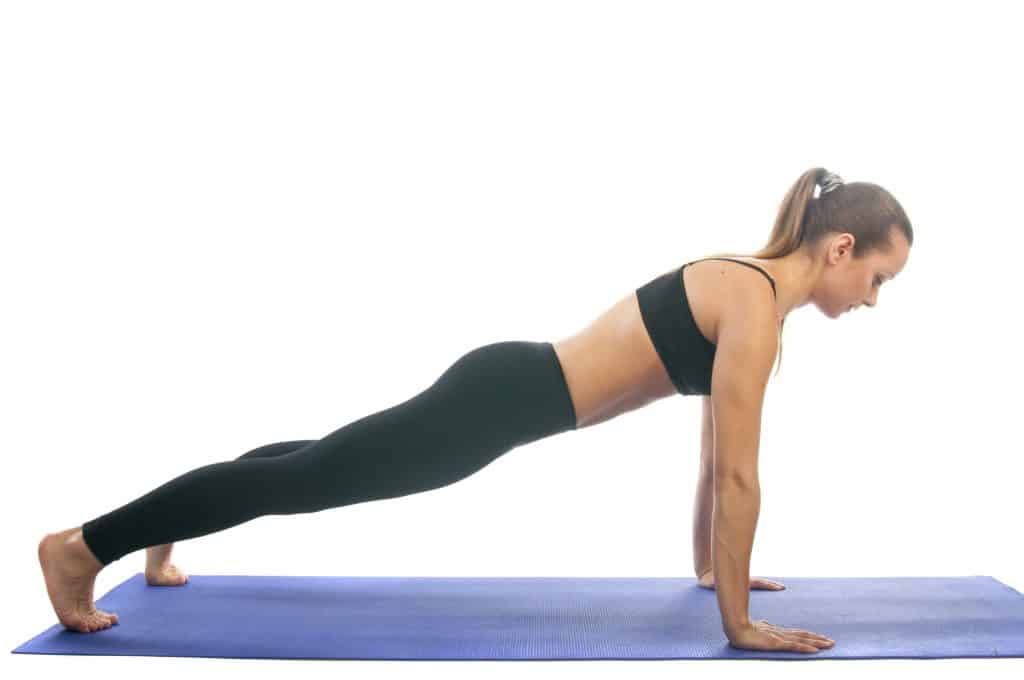
It might come as a surprise to you, but the popular plank pose is actually a Yoga asana. It is a perfect strengthening exercise for the whole body and doesn’t really need any flexibility.
On the contrary, you want to make yourself “straight as a stick”. This means holding your body in a straight line while tensing all your muscles – your core, your legs, and your arms. Hold this pose daily for 10 breaths and you’ll notice how much easier it gets pretty quickly.
As a beginner, you might not have the arm strength yet to hold the full pose for a few breaths. Don’t worry, you can easily modify it.
Like a traditional pushup, you can take some weight off your core simply by resting your knees on the floor. Make sure to straighten your body nevertheless – you’ll only get stronger if it’s a challenge!
Want a more in-depth guide to starting your yoga journey as a completely inflexible beginner? Read this!
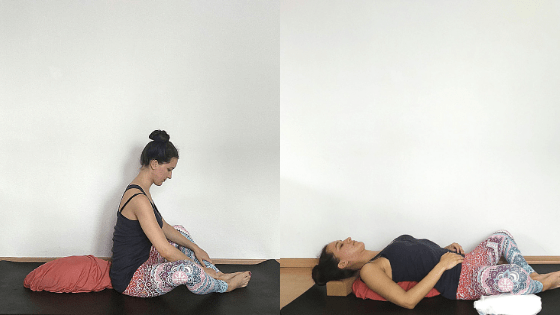
5. Reclined butterfly pose
If you are ever in need of something more relaxing than plank pose, you’ll love the reclined butterfly. This pose is best done with a few pillows and bolsters and helps you relax while at the same time working on flexibility in your hips. What’s not to love?
To get into this pose, first, sit down on the floor and bring your feet together, so that your legs build a diamond shape. Then place a bolster or simply a rolled up blanket behind you and lie back on it. You can also put something under your head, just try what feels better!
If the stretch on the inner side of the legs is too strong, simply put a couple of pillows below your knees. And now all you have to do is to relax and let gravity work its magic!
Related: I can’t do butterfly stretch – What now?
Try doing this pose in the evening before going to sleep and hold it for at least 10 breaths and up to a few minutes. It will calm your whole system down and help you sleep better.
Related: Yoga for better sleep: Enjoy bedtime yoga!
PS: Ladies, this pose is also amazing when you are suffering from monthly cramps. If you are looking for that kind of relief, definitely put pillows under your knees. It will help relax exactly those muscles that are cramping.
Related: 5 Yoga hip openers to gently release tension
How often to do your “Yoga for the inflexible”
As you probably guessed it won’t be enough to do these poses once if you want to gradually increase your flexibility and fitness.
But at the same time, you can quickly see results simply by practicing these 5 poses. Ideally, take a few minutes every day and make it a daily habit. The minimum you want to aim for is 3 times a week. (Come on, you can find 30 minutes in your week!)
So now pin this to your best fitness board and then make sure to practice, practice, practice!
Hi, I’m Leo, the Yogi behind Yogabullet. I’ve been practicing Yoga for over 10 years now.
My goal with this blog is to show people how Yoga can help anyone, no matter how fit they are, to love their body and their life more.
I’ve experienced the life-changing power of Yoga myself and made it my mission to share this with as many people as possible.
I am a Registered Yoga Teacher (RYT) with Yoga Alliance, which acknowledges the completion of a yoga teacher training with a Registered Yoga School (RYS).